By the end of this tutorial you will have set up an AI voice agent that uses a custom, self-hosted MCP (model context protocol) server to fetch the current weather info for various cities around the US. You can try it out right now:
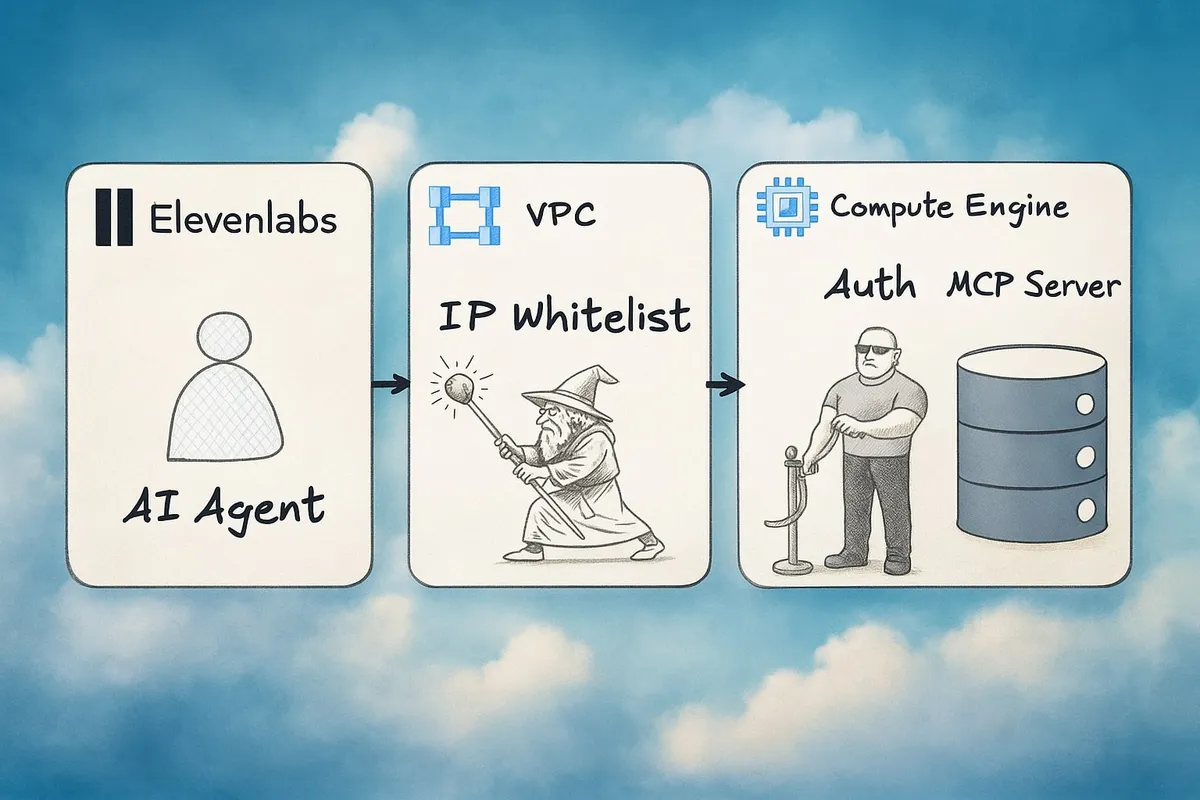
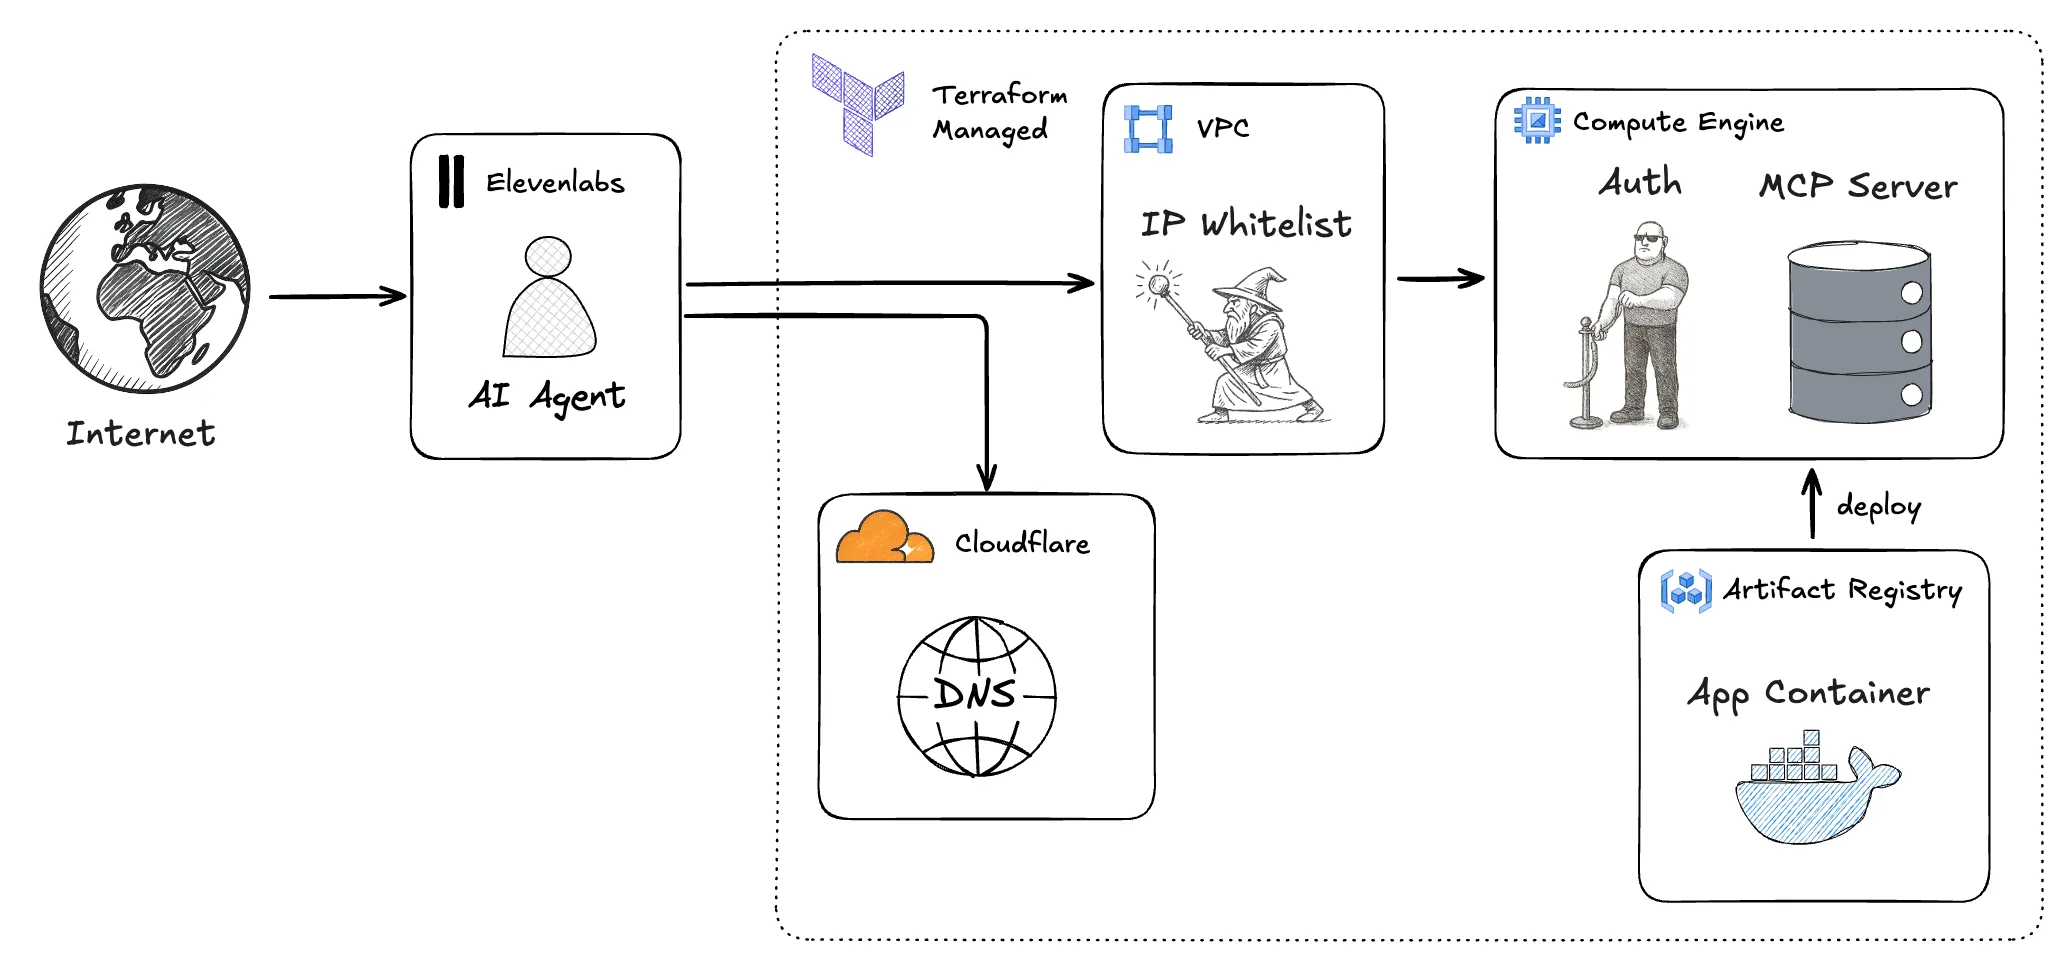
In other words, our goal is to build and deploy a system that can operate in a small-scale production environment, e.g., an internal tool or your personal blog. This means we will spend most of our time on infrastructure and security. Expect a mix of ClickOps, e.g., when generating service accounts, and using the command line. Once the infra is in place, you are more then welcome (encouraged even) to modify the code, change available tools, and hack away. In the mean time, here is an architecture diagram of what we’ll set up:
Who this is for
This tutorial is for programmers and data people that want to learn how to build AI systems. You have read some introductory material on MCPs, maybe tinkered with it locally, but now want to step up your game and build a real project with it. To get the most out of it, it helps if you are familiar with the following:
- You can read and write Python code.
- You are comfortable using the command line (terminal).
- You know what an MCP is and, at a high-level, understand how tool calling works.
- You understand the terminology of internet and cloud infrastructure.
- You can run shell scripts (
.sh) in your terminal
If the above doesn’t describe you exactly that’s not a problem at all. You can talk to ChatGPT or search for things if you want more detail on something we are not covering here. In a similar vein, you can fast-track sections where you already feel confident and there is too much detail for you.
What should you prepare
Before starting to go through this tutorial, please set up and install the tools below. Chances are high that you already have most of them:
| Accounts | Tools | Resources |
|---|---|---|
| • GCP account | • The gcloud CLI (link) | • A registered domain for which CloudFlare manages the DNS ◦ Buy a new domain in CloudFlare (link) ◦ Transfer a domain to CloudFlare (link) |
| • CloudFlare account | • Docker (link) | • cloned project repo (link) |
| • ElevenLabs account | • Terraform (link) | |
• the uv package manager (link) | ||
| • node (link) | ||
| • openssl |
Configuring the project
Step 1: Preparing the GCP Project
To begin this deployment we need to manually enable some systems in GCP so that Terraform can manage the infrastructure for us later. This happens in 3 steps:
- We need to grab the project ID to tell Terraform which project to manage.
- We need to provision a service account for Terraform to log in.
- We need to enable all the services that Terraform should manage.
Getting the Project ID
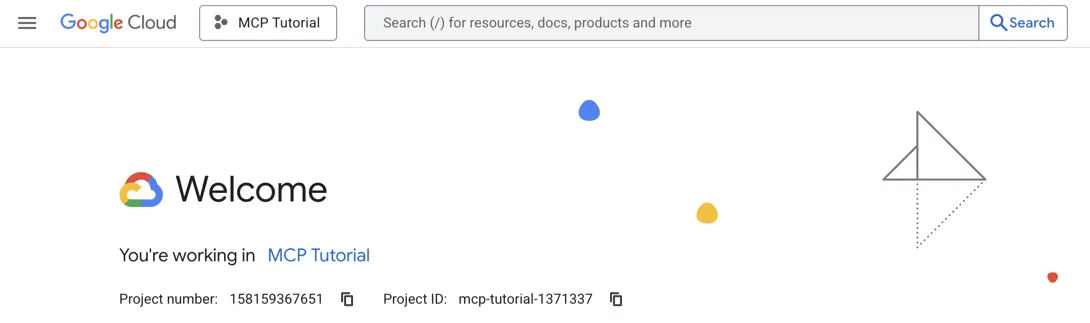
First things first, we need to login to the Google Cloud Console at https://console.cloud.google.com/welcome. Make sure that your project is selected in the right corner of the header and you should be greeted by a welcome page.
On this page, we need to grab the Project ID and save it for later. To do this
create an empty .env file in your project root and add the following line:
TF_VAR_google_project_id={paste-your-GCP-project-ID}Navigating GCP
Going back to the browser window, you can find the search bar in the center of
the header. We will use it to navigate GCP efficiently. To open it press ”/” on
your keyboard. If nothing happens the problem is likely that the browser window
is not in focus and keyboard inputs are being sent to a different application or
tab. Once you have opened the search bar, type the query (e.g., service accounts) and the results will show us the matching pages. Use the arrow keys
↑↓ to navigate the search results and once you selected what you wish to
access hit Enter.
Setting up the Service Account
We need to set up the service account for Terraform so that it can provision infrastructure on our behalf. The setup is a simple ClickOps procedure which works as follows:
Awesome. We now have the service account and access credentials ready to go. Move the JSON file you downloaded in the last step into the project’s root folder so that Terraform can pick it up later and authenticate with GCP.
Enabling Required Services
Next up we need to activate the services we need. This is as simple as
navigating to the dashboard of the respective service and clicking the
"Enable" button. To navigate to a service use the procedure introduced at the
beginning of this tutorial: Press / to open up the search bar, type the name
of the service, select it with the arrow keys ↑↓ and hit Enter.
Then, on the page that opens click Enable:
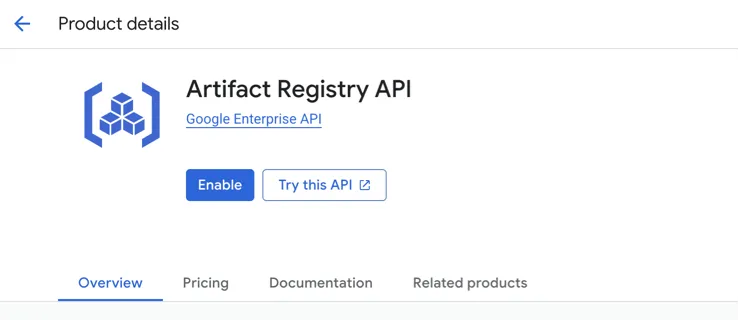
Do this processes for the following services:
- Artefact Registry
And with that GCP is now primed and ready for setting up the MCP server. Great work so far!
Step 2: Preparing Cloudflare
In addition to GCP, Terraform will also configure the DNS on Cloudflare to forward requests to our server. To do this it needs an API key. Here are the steps to create one:
Sidenote: ☝️Don’t get your hopes up. The API key in this slideshow is invalid - I just don’t have a paid version of Scribe so I can’t blur it 😢.
That was easy! With the API key in hand add the following lines to the .env
file in your project root:
TF_VAR_google_project_id={paste-your-GCP-project-ID}

TF_VAR_cloudflare_api_token={paste your Cloudflare API Key}
TF_VAR_cloudflare_subdomain=mcp-server

domain=${TF_VAR_cloudflare_subdomain}.wallkotter.com
This tells Terraform to provision the server under mcp-server.wallkotter.com,
which is my domain. You will need to replace wallkotter.com with the name of
your primary domain. If you don’t want the mcp-server subdomain you can change
the value to something else, e.g. mcp. If I did that in the above, my MCP
server would become available at mcp.wallkotter.com. Change those values to
your liking and need.
Step 3: Issuing an SSL Certificate
If we deploy the server now the result would be a very insecure setup since connections can only happen over unencrypted HTTP. What’s more is that most AI SaaS tools (including ElevenLabs) require MCP servers to use HTTPS, so not only is our setup insecure we also can’t accomplish our use-case. Thus our next step is adding HTTPS which means we need to obtain a CA-signed SSL Certificate.
To make this easy we can use scripts/ssl_certificate.sh which will contact
Let’s Encrypt and ask for a certificate for the domain we’ve configured above.
For the example config above that would be mcp-server.wallkotter.com. To test
the setup you need to run the following in a terminal:
uv sync --extra dev # install dependencies in case you haven't
set -a
source .env
set +a
./scripts/ssl_certificate.sh --staging
This will produce a staging certificate. We can’t use staging in production (duh!) but getting a stage cert first allows us to make sure that the setup is correct before we enter the Let’s Encrypt production environment. They enforce a rate limit of 5 certificates per week.
Let’s double-check that we got the right certificate:
openssl x509 -in src/static/ssl_fullchain.pem -noout -subject -issuer -datesThe command should print something along the lines of
subject=CN=mcp-server.wallkotter.com
issuer=C=US, O=(STAGING) Let's Encrypt, CN=(STAGING) False Fennel E6
notBefore=Aug  3 10:58:30 2025 GMT
notAfter=Nov  1 10:58:29 2025 GMT
Make sure that subject=CN= is followed by the exact domain name where your
server will be reachable. If that checks out, request the production
certificate. This will replace the staging one in-place:
./scripts/ssl_certificate.shNote: The generated certificate will be valid for 90 days. After this period you will need to request new certificates and replace the current ones. This process can be automated, but how to do so is out of scope for this tutorial.
Running this script will produce two files as a side-effect:
./src/static/ssl_privatekey.pem: The private key the server will use to sign messages. This allows the server to prove that messages indeed originated from us../src/static/ssl_fullchain.pem: The public certificate the server will advertise. Clients use it to validate each message signature.
Both files are already in the right location to be picked up by the server later. With this done we have HTTPS in place; a first strong step towards a setup that can stand its ground on the open internet. Great job so far! Two more steps to go.
Step 4: Create an API key for our Server
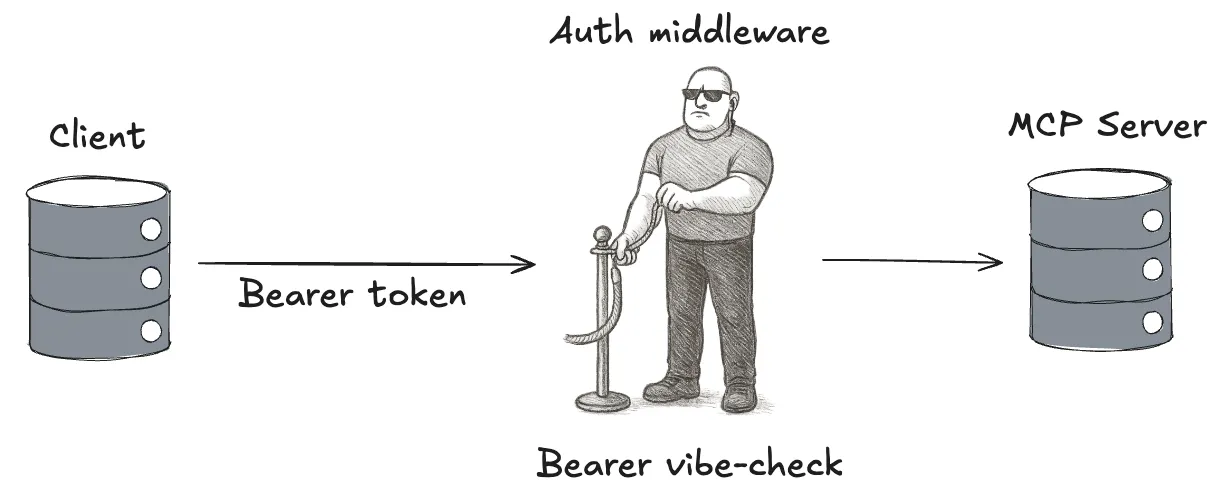
HTTPS prevents outsiders from listening to interactions between clients (AI agents) and our MCP server. We also give clients a way to validate that they are talking to the right server. Now we will set up an API key to allow the server to validate that it is talking to the right clients and to also limit access to only those clients that we approve.
Similar to the previous section there is a prepared script that sets this up.
It’s under scripts/auth_token.py and you can run it in the terminal using
set -a
source .env
set +a
./scripts/auth_token.pyNote: The generated API Key will be valid for 90 days. After this period you will need to issue a new one and replace it. We can set any validity period in the script, but 90 days is a good number because it coincides with SSL certificate renewal. That way you know it’s time for new certificates when your API key expires.
The script produces 4 files as side-effects:
./private_token_key.pem: The private key used to issue new API keys../static/public_token_key.pem: The public key used to verify token validity in PEM format../static/jwks.json: The public key used to verify token validity in JWK format../auth_token.txt: The API key to distribute.
Most files are already where they belong with the exception of auth_token.txt.
This one we will use later when configuring ElevenLabs (or any other AI SaaS) to
use the MCP.
Nice! We are well on our way to get a solid small-scale deployment up and running. We have our cloud providers ready, HTTPS to keep the connection private, and an API key to prevent unauthorized access. One more step and we can hit deploy.
Step 5: Building the IP Whitelist
The final step in the security department is IP whitelisting. We can only do this when we know the range of client IPs in advance and if that is true it is highly recommended to add.
The way we will set it up for this project is by using a NAT-level firewall
which is free on GCP. To configure it go to infra/google.tf and find the
google_compute_firewall resource:
resource "google_compute_firewall" "mcp_server_https" {
  name    = "mcp-server-https"
  network = "default"

  allow {
    protocol = "tcp"
    ports    = ["443"]
  }

  direction = "INGRESS"
  source_ranges = [
    "0.0.0.0/0"
  ]

  target_tags = ["mcp-server"]
  description = "Allow HTTPS traffic to MCP server on port 443"
}
The first line tells us that we are defining a google compute firewall rule. The rest of the definition specifies the config for that rule. The config we need to modify is:
source_ranges = [
"0.0.0.0/0"
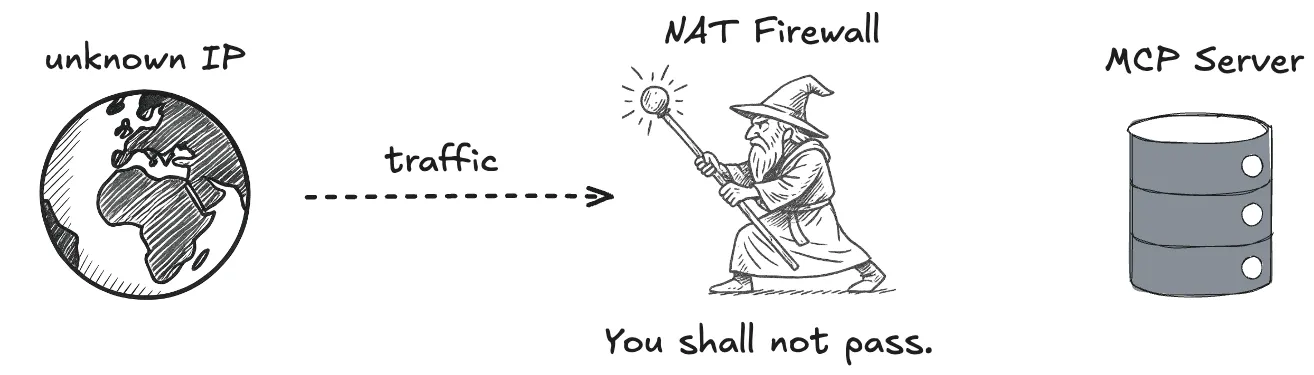
]which contains the list of IP subnets to which this rule applies. In a nutshell,
any IP from any subnet listed here will be allowed to contact our server via
HTTPS. Any IP from any subnet not listed will get a “you shall not pass”.
Subnets are defined using CIFR format, meaning the first four numbers
(0.0.0.0) set the prefix of the subnet and the last one (/0) sets the prefix
length. A mask of /0 means that there is no subnet, aka. any IP address is
allowed. Let’s change that.
To start, we add our machine’s public IP. In a terminal run the following command:
curl -4 ifconfig.meIt will print your current public IP address. Right now mine is 24.218.3.117.
Since we only want to allow this one IP we choose a prefix length of /32 and
define a subnet with exactly one IP. We combine both pieces of data and update
the current source_ranges:
source_ranges = [
    "24.218.3.117/32"  # NOTE: replace with your IP :)
  ]
Next we will allow Elevenlabs agents. Like most vendors, Elevenlabs publishes
their public IPs in their
docs.
We will use the same /32 prefix length as before to add the ones we need. My
Elevenlabs account is in the US so I will whitelist their US-based IP addresses.
If you need the ones for EU or Asia please adjust accordingly:
source_ranges = [
    "24.218.3.117/32"

    # Elevenlabs IP addresses
    "34.67.146.145/32",
    "34.59.11.47/32",
  ]
And with that our project is configured and ready to deploy. Great job making it through the “dry” security piece.
Step 6: Terraform Deployment
Given all the work we have done up to this point you would expect some kind of climax for deployment. Unfortunately, it’s rather simple. Open a terminal and run
set -a
source .env
set +a
cd infra
terraform init
terraform deploy
This will generate a lot of output in the console and and some point ask “Do you
want to perform these actions?” to which we respond: yes. That’s it. It may
take a minute or two to deploy, but once the command completes your server is up
and running. You can reach it at the domain you have configured in step 2. For
me that’s https://mcp-server.wallkotter.com/mcp.
To test that our server is live we can use the MCP inspector. Start it with the following command:
npx @modelcontextprotocol/inspectorthen follow this short ClickOps procedure:
Voila! MCP server deployed, online, and ready for traffic 🎉🎉
Step 7: Integrating with ElevenLabs
To complete this tutorial and create something we can show off let’s head over to Elevenlabs and integrate our MCP server. This is once again a ClickOps sequence:
And with that we arrived back in AI Agent land. Let’s round it off by creating a
simple Conversational AI agent on Elevenlabs that uses our MCP. I’ve prepared a
system prompt in /elevenlabs-prompt.txt that you can use for this:
Awesome! You are now the proud owner of a self-hosted MCP server that is integrated with Elevenlabs. The “Copy Link” button in the top right corner of Elevenlab’s agent page will get you a link that you can share with friends so they can check out what you’ve built.
If you have any questions or something doesn’t work, feel free to reach out on LinkedIn :) I’m on there regularly to talking about tech and AI.